Need Help?
Minecraft issues? Write to Cubion team. We'll help you solve them.
Launcher on macOS
Quick answer
Step-by-step guide to install the Cubion Launcher on macOS: download the .dmg, drag to Applications, sign in with Microsoft, choose Minecraft version, install mods, and launch the game.
Current install process
Cubion for Windows is code-signed, and the steps below are the current recommended install flow. On some systems, SmartScreen can still show a caution message while certificate reputation builds. Follow these steps to get Cubion running.
- 1
Download
macOS download is temporarily unavailable. See status or check the Windows download page.
- 2
Install to Applications
Open the .dmg and drag Cubion to Applications.
- 3
Run Terminal commands (required)
macOS may block the app. Copy and run in Terminal:
Terminal$xattr -cr /Applications/cubion.app$open /Applications/cubion.appFirst removes quarantine, second launches Cubion. Replace
cubion.appif your app has a different name. - 4
Launch
Open from Applications or Spotlight (⌘+Space).
Then what? The full guide below covers sign-in with Microsoft, choosing versions, installing mods, and launching the game.
Installing the Cubion Launcher for Minecraft on your macOS device is a simple and seamless process. Follow these easy steps to get started and dive into your modded Minecraft experience.
Step 1: Download the Cubion Launcher
Simply click the “Download” button to get the macOS installer. The file will be in .dmg format. Once the download is complete, locate the file in your downloads folder.
Tip: Download only from the official cubion.io website for a safe installer.
Step 2: Open the Installer
Double-click the downloaded .dmg file to open the installer. A window will appear, prompting you to drag the Cubion Launcher icon into the “Applications” folder. This is a standard macOS installation procedure.
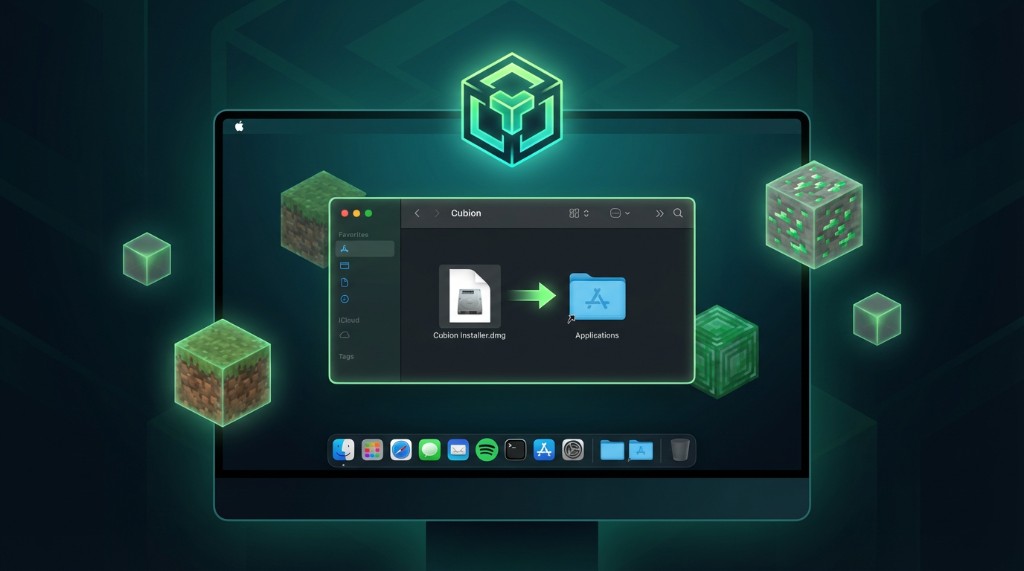
Drag the Cubion Launcher icon to the Applications folder, then eject the disk image when the copy is complete. You can then open Cubion from Applications or Spotlight.
Step 3: Sign in to Your Microsoft Account
Once the launcher opens, you’ll need to sign in to your Microsoft account. If you’re not signed in yet, click on the “Log in with Microsoft Account” button. You will be prompted to enter your account details. After successful authentication, the launcher will display a confirmation that you are logged in.
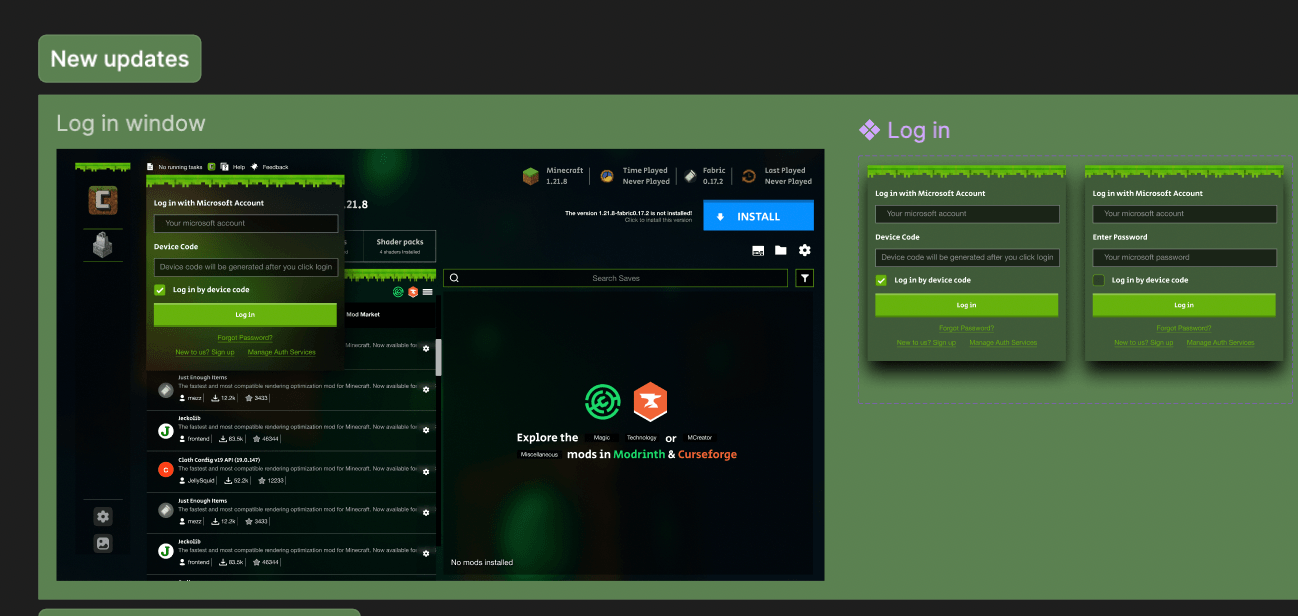
Cubion uses the official Microsoft sign-in flow—your password is never entered into the launcher itself, only on Microsoft's secure page.
Step 4: Choose Your Minecraft Version
Next, choose the Minecraft version you wish to play. Cubion Launcher supports various versions, and you can easily select the one that fits your needs. From here, you can explore mods, install them, and customize your Minecraft experience.
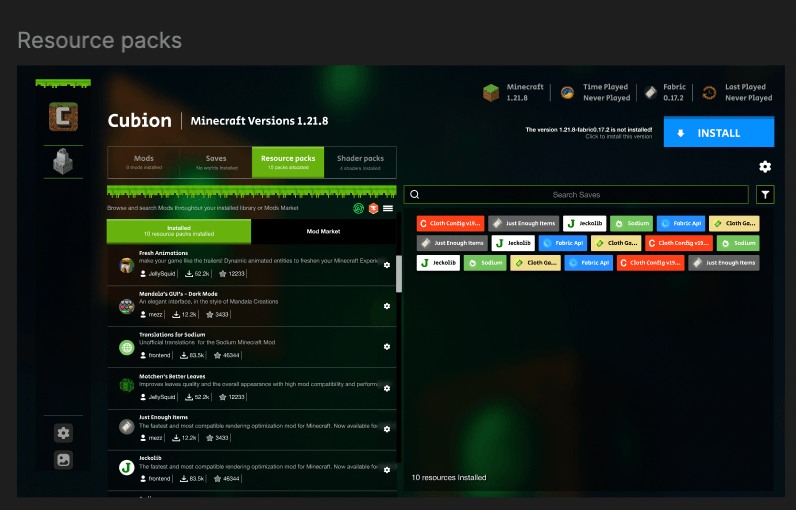
Pick the same version your modpack or server uses to avoid compatibility issues.
Step 5: Download and Install Mods
With Cubion, modding your Minecraft experience is simple. Browse the Mod Market, select your desired mod, and install it in just a click. The launcher will handle the rest, ensuring everything is set up correctly.
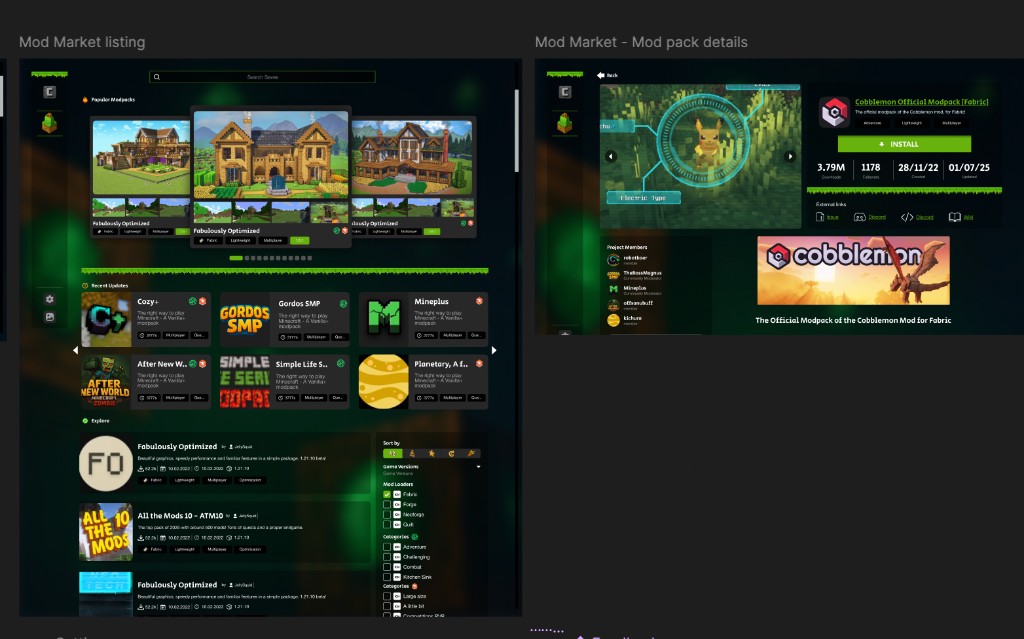
One-click modpacks
You can also install full modpacks from CurseForge and Modrinth directly in Cubion—no manual file copying needed.
Step 6: Launch Minecraft
Once your mods are installed, hit “Play” to start Minecraft. Cubion optimizes the game for you, allowing for a smooth and enhanced experience. Enjoy your modded Minecraft world!
Ready to play?
Click the green Play button in the launcher to start your game.
macOS download is temporarily unavailable while we finish the next build. Download Cubion 0.0.5 for Windows in the meantime.
Download Cubion for WindowsBy following these steps, you can quickly set up Cubion Launcher on macOS and start playing Minecraft with custom mods. For a safe and hassle-free installation, make sure to follow the process outlined above. The Cubion Launcher offers an easy way to enjoy Minecraft with mods—safely and efficiently!
Need more help?
For additional support, visit our FAQ page or join our community on Discord.